A Guide to installing and using the Nessus Vulnerability scanner
GOAL
In this article I will install Nessus Essentials on a host PC, access a remote VM and run various scans in to detect vulnerabilities such as misconfiguration, default passwords, unpatched services, etc. We will compare the results of a basic scan versus a credentialed scan, as well as install deprecated software to the virtual machine OS to monitor the effect that it has on the scan results. Finally, we will remediate the vulnerabilities to an acceptable degree.
Quick Note: This project uses a Windows 10 virtual machine with a bridged NIC alongside your primary PC. My previous post titled [ ] can be adapted for use with Windows 10 if needed.
Required
Nessus Essentials - https://www.tenable.com/downloads/nessus?loginAttempted=true
Oracle VM VirtualBox (or other hypervisor of choice)
Windows 10 ISO - https://www.microsoft.com/en-us/software-download/windows10ISO
Firefox (deprecated version) installed on VM - https://ftp.mozilla.org/pub/firefox/releases/3.6.12/win32/en-US/
INSTALLING NESSUS ESSENTIALS
Nessus is a widely used vulnerability assessment solution offered by Tenable. Although intended for students and hobbyists, Nessus Essentials allows you to scan your own environment with the same high speed, in-depth assessments, that would be conducted in a larger enterprise environment using their Professional version.
Step One: Download the Nessus Essentials software
On your primary machine, download Nessus Essentials (link provided above) and install it. You will need to register with Tenable in order to obtain an activation code before using the software. Once installed, your web browser will direct you to the Nessus web interface. Finally, input the provided activation code and create your username and password for the service.
Step Two: To ensure connectivity to your VM
In your VM, open Command Prompt and get the IPv4 Address by typing:
ipconfig

On your host PC, open the Command Prompt and type:
ping "insert VM IP address here"
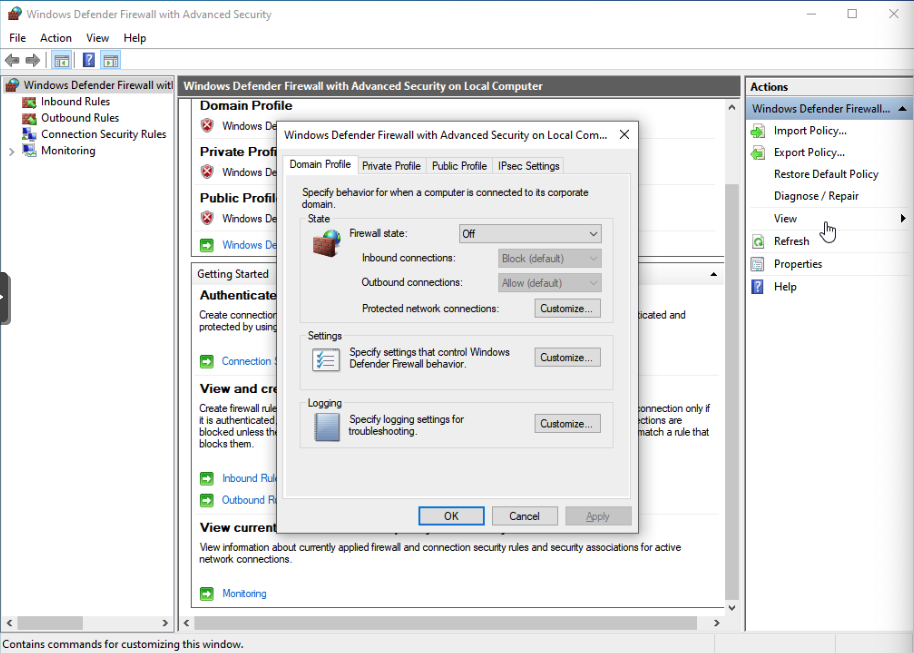
If your ping timed out, type wf.msc in your VM search bar. This will open the Windows Firewall settings. In the Windows Defender Firewall Properties, click on the following tabs and turn them off.
Domain Profile
Private Profile
Public Profile
Step Three: Connecting to Nessus through SSH
Back on your primary machine, type https://localhost:8834/ into your web browser and login to Nessus using the username and password created earlier.
RUNNING A VULNERABILITY SCANS
Scan Configuration
In Nessus, select +New Scan - Basic Network Scan. In the settings, name the scan and type your VM’s IP Address in the Targets field.

For these purposes, we will be running a basic manual scan, however there are many settings for scheduling scans and customizing how granular you want the scan to be. Once saved, the scan configuration will now be listed in Nessus under My Scans. Hit the “play” icon to begin scanning.
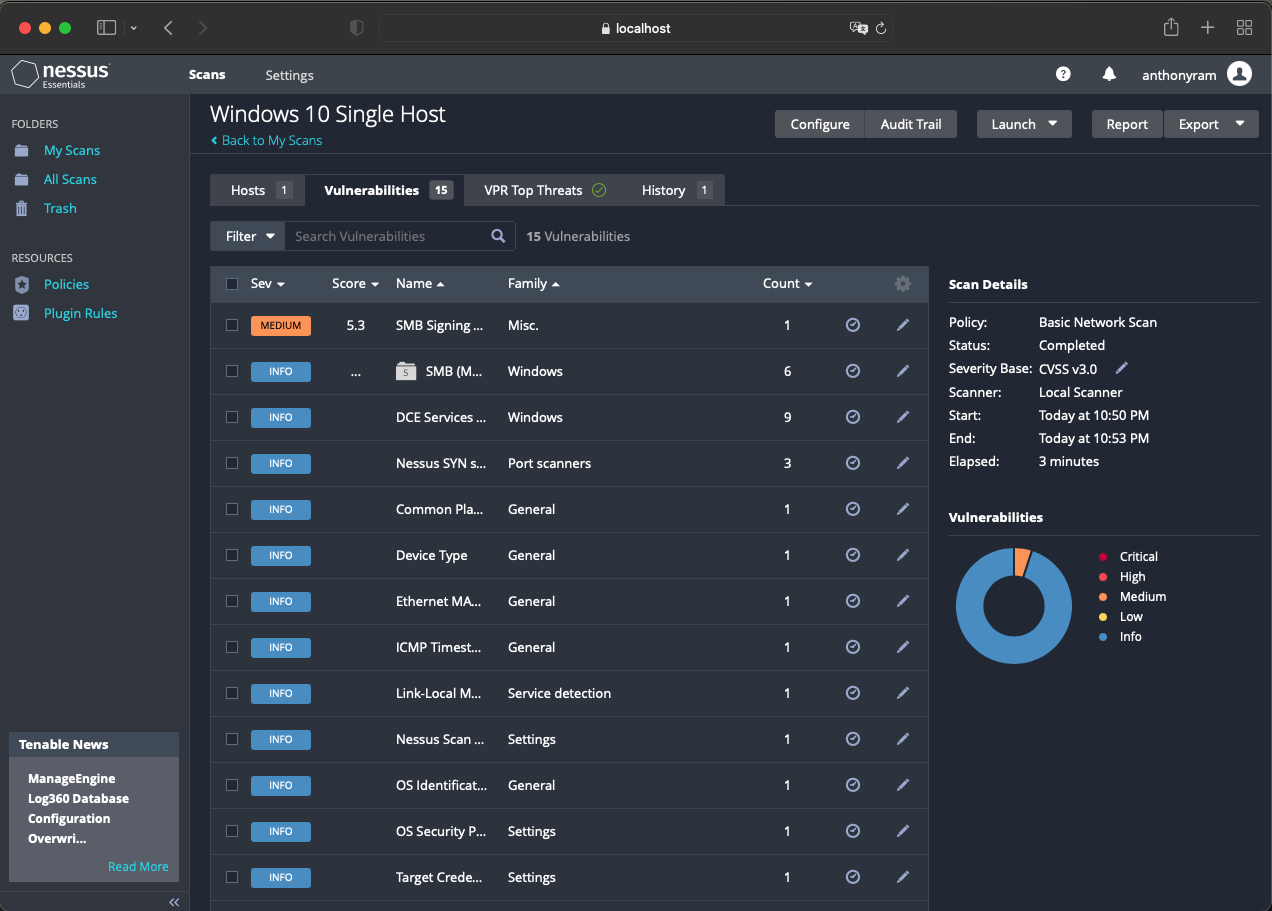
Initial Scan
Once complete, you can click on the scan to view the results. Nessus displays details regarding any vulnerabilities that were discovered, along with their severity.

Credentialed Scan
Credentialed scans can be a bit more complex to configure in order to accept a remote scan. Tenable recommends certain settings enabled when performing credentialed scans on Windows hosts that are not on the domain. The documentation can be found here: https://community.tenable.com/s/article/Scanning-with-non-default-Windows-Administrator-Account
Step 1: Enable Remote Registry
In the VM, open up Services.msc. Locate Remote Registry from the list and change the Startup type from Disabled to Automatic.

Step 2: Turn on File and Printer Sharing
In the VM, navigate to Network and Sharing Center, then Advanced Sharing Settings. Ensure that “File and Printer Sharing” is turned on.

Step 3: Change User Account Control Settings
In the VM, navigate to the Control Panel, under the User Account Control Settings, slide the slider down so that notifications are turned off when changes to the computer occurs. Note: This is typically never recommended, however we want to give Nessus a clear path to search for vulnerabilities. Once scanning is complete, revert this setting back.

Step 4: Edit Registry
Search regedit to open the Registry Editor. Browse to the following directory: HKEY_LOCAL_MACHINE/SOFTWARE/Microsoft/Windows/CurrentVersion/Policies/System/
In this folder create a DWORD called LocalAccountTokenFilterPolicy and set the value to “1”
Restart the VM.

Run your credentialed scan
In Nessus Essentials, edit the previously configured scan settings by selecting the scan, clicking on More - Configure. Include the Windows 10 VM login credentials by clicking on the Credentials tab and selecting Windows. Save the configuration and begin scanning again. Examine the results this time.


Install Deprecated Software
In the Windows VM, use the link provided above to download/install a very old version of Firefox. Once complete, return to Nessus and run another credentialed scan. There will be no need to modify the configuration settings, it will perform all of the same scans as before (i.e. scan the registry, common ports, inspect the file system) and it should discover the old Firefox that was installed.


Resolving Vulnerabilities
Upon inspection of the latest scan results, Nessus detailed remediation recommendations for each vulnerability as well as a “Vulnerability Priority Rating (VPR)” system that will guide your focus from a high level.

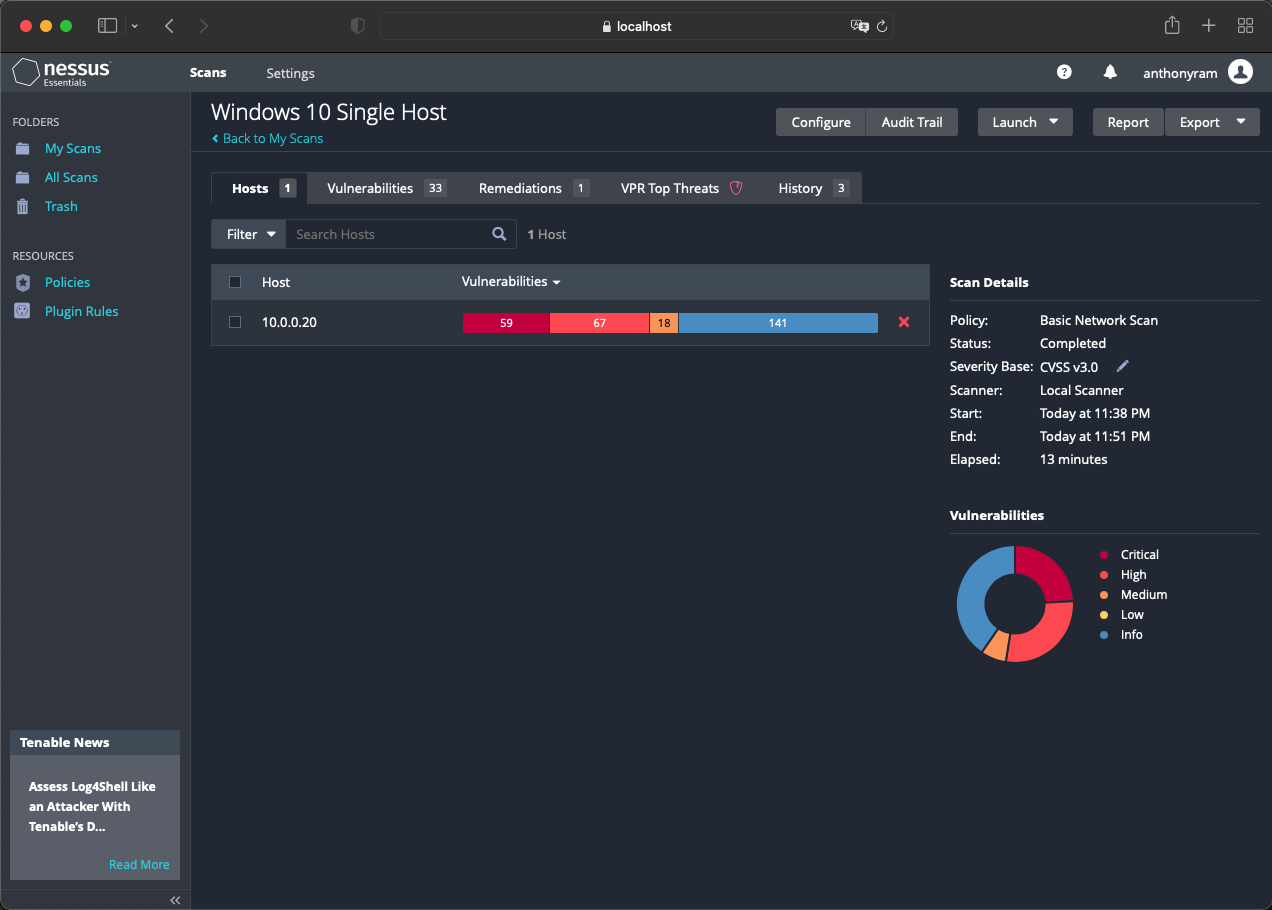
SUMMARY
For the purposes of this project the remediations that were taken included uninstalling Firefox completely and following the suggestions provided by Nesses for critical and high rated vulnerabilities. As this was a fresh install of Windows 10 being used, many of them were remediated by simply updating Windows multiple times. The data below displays a brief overview of my scan results and solidifies the importance of credentialed scanning and importance of vulnerability management as a preventative best practice.